Persona Outfit

How Can You Make Nail Polish Dry Faster​: Expert Tips Revealed

Waiting for your nail polish to dry can feel like forever, especially when you’re eager to show off your fresh manicure or get on with your day. But what if you could speed up that drying time without smudges or mess? You’re about to discover simple, effective tricks that actually work to make your nail polish dry faster—no fancy gadgets or expensive products needed. Ready to save time and keep your nails flawless? Keep reading to find out how you can get perfectly dry nails in a flash! Credit: www.wikihow.com Apply Thin Coats Applying thin coats of nail polish is a smart way to speed up drying time. Thick layers trap moisture and take longer to dry. Thin coats let air reach the polish easily, helping it set faster. This simple step can make your manicure quicker and smoother. Why Thin Layers Dry Faster Thin layers have less liquid, so they dry quickly. Thick coats stay wet longer because the polish is deeper. Air touches thin coats more, helping evaporation. This means your nails dry faster and are less likely to smudge. Thin coats also reduce bubbles and streaks. How To Achieve Even Coverage Start with a small amount of polish on your brush. Use three strokes: one down the middle, one on each side. Don’t overload the brush or polish will pool. Let each layer dry before adding the next thin coat. This keeps the polish smooth and even. Practice steady, gentle strokes for a neat finish. Use Quick-dry Top Coats Using quick-dry top coats is a simple way to speed up nail polish drying time. These products create a protective layer that hardens fast. This layer helps seal the color and prevents smudging. Applying a quick-dry top coat right after your nail polish makes your manicure dry much faster. It also gives your nails a shiny, smooth finish. Benefits Of Fast-drying Top Coats Fast-drying top coats reduce waiting time after painting nails. They help protect your polish from chips and scratches. These top coats improve the shine and look of your nails. They also make your manicure last longer. Using them means less chance of ruining your fresh nail polish. Quick-dry top coats work well with most nail polish types. Best Products To Try Some popular quick-dry top coats include Seche Vite Dry Fast Top Coat and Sally Hansen Insta-Dri Top Coat. Essie Quick-e Drying Top Coat is another good option for fast drying. These products are easy to find in many stores or online. They offer reliable results and a glossy finish. Trying one of these can help you get dry nails faster. Try Drying Drops And Sprays Drying drops and sprays offer a quick solution to speed up nail polish drying. These products work by speeding up the evaporation of the polish’s liquid components. They help nails dry faster without smudging or ruining your manicure. Using drying drops or sprays is a simple step that fits easily into your nail routine. How Drying Drops Work Drying drops contain ingredients that help polish dry quickly. They reduce the time it takes for the polish to harden. When applied, they form a thin, protective layer over the polish. This layer speeds up evaporation and prevents smudges. Drops and sprays also add shine and smoothness to your nails. When To Apply Them Apply drying drops or sprays after your last nail polish coat. Wait about one minute after finishing the polish. Gently place a drop on each nail or spray a light mist over them. Avoid rubbing or touching the nails after application. This ensures the product works effectively and your nails dry faster. Credit: www.opi.com Dip Nails In Ice Water Dipping your nails in ice water is a simple and effective way to speed up nail polish drying. The cold water helps harden the polish quickly, reducing the waiting time. This method works best when you follow the right steps and timing. Preparing The Ice Water Bath Fill a small bowl with cold water and add ice cubes. The water should be very cold but not freezing. Stir the water gently to keep it evenly chilled. Make sure the bowl is large enough to fit your fingers comfortably. Timing For Best Results After applying nail polish, wait about two minutes for it to set slightly. Then dip your nails into the ice water for two to three minutes. Keep your fingers still during this time. Remove your nails and let them air dry for a few more minutes for a smooth finish. Blast Nails With Cold Air Blasting your nails with cold air is a simple trick to speed up drying. It cools down the polish, helping it harden faster. This method is easy to do at home and needs no special tools. Using A Cool Hairdryer Set your hairdryer to the cool air setting. Hold it about six inches from your nails. Move it slowly over each nail for one to two minutes. The cold air helps solidify the polish without melting it. Avoid using hot air, as it can cause smudges or bubbles. Benefits Of Cold Air Cold air lowers the temperature of the nail polish. This quickens the drying process and reduces waiting time. It also prevents polish cracks that happen with fast drying under heat. Cold air is gentle on your skin and polish. It keeps your manicure neat and smooth. Use Cooking Spray Hacks Cooking spray is a surprising trick to dry nail polish quickly. It works by creating a thin, even layer that helps the polish harden faster. This simple hack can save you time and reduce smudges. How Cooking Spray Speeds Drying Cooking spray contains oils that help the polish dry faster. When you spray a light mist over wet nails, it forms a smooth barrier. This barrier stops air from slowing the drying process. The polish hardens quicker and stays smooth without streaks. The spray cools the polish slightly. Cooler polish dries faster than warm polish. The quick cooling … Read more
10 Best Dresses for Short Curvy Women to Flaunt Your Style Confidently

10 Best Dresses for Short Curvy Women

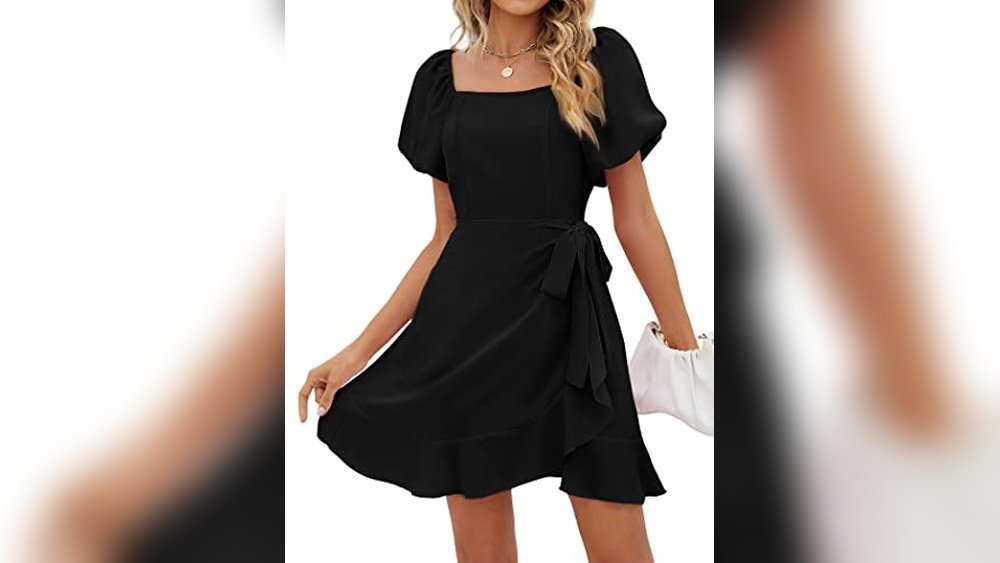
Finding the perfect dress as a short, curvy woman can feel like an endless struggle. Many dresses don’t fit right, making you feel uncomfortable or self-conscious. You might spend hours searching, only to end up with clothes that don’t flatter your shape or suit your style. But it doesn’t have to be this way. The right dress can boost your confidence and make you feel beautiful every day. It fits perfectly, highlights your curves, and lets you move with ease. Whether for work, a wedding, or a casual outing, the right dress changes how you feel about dressing up. In this review, you’ll find the 10 best dresses designed especially for short, curvy women. Keep reading to discover styles that celebrate your shape and make dressing a joyful experience. Sampeel Summer Dress For Women The Sampeel Summer Dress for Women 2024 is ideal for women seeking a versatile, stylish dress suitable for both work and casual occasions. If you want a comfortable yet elegant outfit for events like weddings, office meetings, or everyday wear, this short sleeve mini dress in classic black is a perfect choice. Pros: Elegant and timeless black color that suits various occasions Lightweight and breathable fabric ideal for summer wear Flattering mini dress length with comfortable short sleeves Versatile design suitable for both work and wedding guest attire High-quality craftsmanship from the trusted Sampeel brand Cons: Limited color option available only in black May require careful styling for very formal work environments The Sampeel Summer Dress combines style and practicality, making it an excellent addition to any wardrobe. Its breathable fabric keeps you cool during warm weather, while the short sleeves and mini length offer a modern, flattering silhouette. Whether attending a casual office day or a summer wedding, this dress adapts seamlessly to different settings. Moreover, the dress’s simple yet elegant design ensures easy accessorizing, allowing users to create multiple looks with minimal effort. The trusted Sampeel brand guarantees durability and quality, providing confidence in your purchase. Overall, this dress is a smart investment for women who want a chic, multipurpose summer outfit. Wiholl Summer Outfits For Women Plus Size Dresses The WIHOLL Summer Outfits for Women Plus Size Dresses are perfect for curvy women seeking stylish and comfortable clothing options. Ideal for those who want a versatile dress suitable for casual occasions, weddings, garden parties, beach trips, or resort wear, this dress combines fashion with practicality. If you are looking for a flattering plus size dress that embraces your curves while offering breathability and style, this is an excellent choice. Pros: Flattering V Neck design enhances the neckline and complements curvy figures. Made with breathable fabric ideal for spring and summer wear. Short sleeves provide comfort and ease of movement in warm weather. Attractive 5-mandala Boho Print adds a trendy and unique touch. Versatile for multiple occasions including weddings, beach travel, and resort wear. Available in 3XL, catering specifically to plus size women. Cons: Limited color options with only the mandala boho print available. May require careful washing to maintain the vibrant print and fabric quality. The WIHOLL Plus Size Dress is thoughtfully designed to celebrate curves without compromising on style or comfort. The V neck and short sleeve design allow for a flattering silhouette that breathes well in warmer climates. Whether attending a casual garden party or a beach resort vacation, the dress offers a relaxed yet elegant look that enhances confidence. The unique 5-mandala boho print makes it stand out, adding a bohemian flair that is both modern and timeless. Additionally, the dress’s versatility is one of its strongest features. It easily transitions from a casual day outfit to a wedding guest ensemble, making it an excellent wardrobe staple for plus size women. The choice of breathable fabric ensures comfort throughout the day, while the 3XL sizing guarantees an accommodating fit. All these features come together to provide a dress that is both practical and fashionable for women who want to look and feel their best during the warmer seasons. Eytino Plus Size Dresses For Curvy Women The Eytino Plus Size Dresses for Curvy Women Ruffle Cap Sleeve Lace V Neck Swing A Line Mini Short Dress in 1X White is ideal for curvy women looking for a stylish and comfortable dress that enhances their natural shape. This dress is perfect for those who want to feel confident and elegant at casual gatherings, parties, or special occasions. If you value both fashion and fit, this dress is designed to flatter your curves while providing ease of movement. Pros: Flattering V Neck design that enhances the neckline. Elegant ruffle cap sleeves adding a feminine touch. Comfortable swing A-line silhouette that suits curvy figures. Delicate lace detailing for a sophisticated look. Lightweight design, weighing only about 0.44 pounds, ensuring comfort all day. Cons: Limited color option, available only in white. Mini length may not be preferred by those seeking more coverage. This Eytino plus size dress features a beautifully crafted lace fabric that adds texture and elegance, perfect for women who want to stand out in a crowd. The cap sleeves with ruffle details contribute to a delicate and charming look, enhancing the overall design without compromising comfort. Its A-line swing cut allows for a flattering fit that gently skims over the hips and thighs, making it ideal for curvy body types. Beyond aesthetics, the dress’s lightweight material ensures breathability and ease of wear throughout the day or evening. The V neck design not only elongates the neck but also adds a touch of sophistication, making it versatile enough for both casual outings and more formal events. Overall, this dress combines style, comfort, and a flattering fit, catering specifically to the needs of curvy women who want to feel beautiful and confident. In’voland Women Plus Size Short Sleeve Dress The IN’VOLAND Women Plus Size Short Sleeve Dress is perfect for women seeking a comfortable yet stylish option for warm weather. Ideal for plus-size individuals who appreciate casual, flowy attire, this dress offers a … Read more

How to Prep Nails for Gel Polish​: Expert Tips for Lasting Shine

how to prep nails for gel polish​

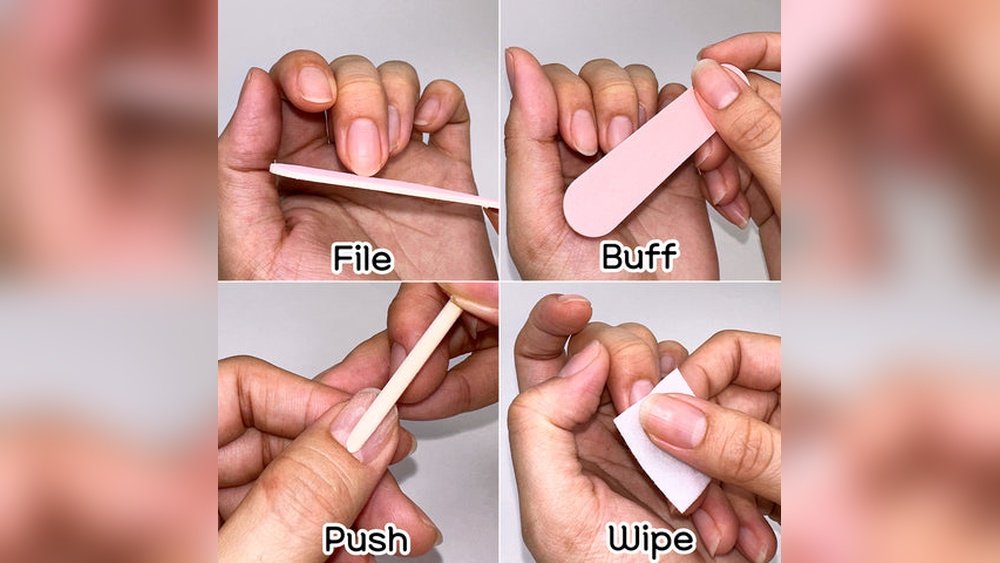
Getting the perfect gel polish starts long before you open the bottle. How you prep your nails can make all the difference between a flawless, long-lasting finish and a polish that chips or peels within days. If you want your gel manicure to look salon-fresh for weeks, you need to follow the right steps to prepare your nails properly. In this guide, you’ll learn simple, easy-to-follow tips that ensure your gel polish adheres perfectly and lasts longer. Ready to transform your nails and avoid common mistakes? Keep reading to discover how to prep your nails for gel polish like a pro. Credit: yokefellowbeauty.com Clean And Dry Hands Clean and dry hands create the perfect base for gel polish. Dirt, oils, and moisture block polish from sticking well. This step helps the gel last longer and look smooth. Start by washing hands with warm water and gentle soap. Remove all traces of lotion and dirt. Dry hands completely using a clean towel or air dry to avoid leaving fibers on nails. Remove Oils And Residue Oils from skin or lotion stop gel polish from bonding. Use a nail cleanser or rubbing alcohol on a lint-free wipe. Wipe each nail thoroughly to remove oils and dust. Ensure Nails Are Fully Dry Wet nails cause polish to lift or bubble. After cleansing, wait a few seconds for nails to air dry. Avoid touching nails with wet fingers or damp towels. Sanitize Your Hands Sanitizing kills germs and ensures nails stay clean during application. Use an alcohol-based hand sanitizer. Rub it over your hands and nails, then let it dry completely. Shape Nails Shaping nails is the first step in prepping them for gel polish. It sets the foundation for a smooth and polished look. Proper shaping makes nails look neat and helps gel polish last longer. Choose a nail shape that fits your style and hand shape. Popular shapes include square, round, oval, and almond. Each shape gives a different vibe and suits different nail beds. Choose Your Nail Shape Decide on a shape before filing. Round shapes are soft and natural. Square shapes look bold and sharp. Oval and almond shapes offer elegance and length. File Nails Evenly Use a fine-grit nail file to shape nails. File in one direction to avoid splitting. Avoid using a back-and-forth motion. This keeps nails strong and smooth. Check Nail Length Keep nails at a comfortable length. Long nails can break easily. Short nails are easier to maintain. Make sure both hands have similar length for balance. Smooth Edges Gently smooth the edges after shaping. This prevents snags and rough spots. A smooth surface helps gel polish apply evenly. Push Back Cuticles Pushing back cuticles is a key step to prepare nails for gel polish. It helps create a clean, smooth surface for polish application. Proper cuticle care prevents lifting and peeling of the gel polish. This process also makes nails look neat and healthy. Use Cuticle Pusher Start by using a cuticle pusher to gently push back the cuticles. Choose a tool with a soft, rounded edge to avoid damage. Hold the tool at a slight angle and push the cuticles away from the nail bed. Do this slowly and carefully to protect the nail and skin. Remove Dead Skin Check for any dead skin around the nail edges. Use a cuticle remover or a soft brush to clean away dry, loose skin. Removing dead skin makes the nail surface smooth and ready for polish. It also helps the gel polish stick better and last longer. Trim Cuticles Carefully After pushing back cuticles, trim any excess skin with cuticle nippers. Only cut the loose skin to avoid injury or infection. Trim small amounts at a time to keep the nail area clean and tidy. Proper trimming ensures a neat look and helps polish adhere well. Buff Nail Surface Buffing the nail surface is a key step before applying gel polish. It helps the polish stick better and last longer. Buffing creates a smooth, even base by removing oils and shine from the nail. This process also helps prevent lifting and chipping. Doing it right protects your natural nails and improves the final look. Remove Shine Gently Use a fine-grit buffer to remove the natural shine of your nails. Buff lightly in one direction to avoid damage. The goal is to dull the surface, not to file down the nail. Removing the shine allows the gel polish to bond properly. Take your time and be gentle for the best results. Avoid Over-buffing Buffing too hard or too long can weaken nails. Over-buffing thins the nail plate and causes sensitivity. It also increases the risk of peeling and breakage. Stop buffing once the surface is matte and smooth. Protect your natural nails by keeping buffing light and controlled. Clean Nail Dust Cleaning nail dust is an important step before applying gel polish. Dust left on nails can prevent the polish from sticking well. It can also cause bumps and uneven surfaces. Removing all dust ensures a smooth and long-lasting gel manicure. Use Lint-free Wipes Lint-free wipes help remove nail dust without leaving fibers behind. They clean the nail surface thoroughly. Use them with a nail cleanser or alcohol to wipe each nail. This step prepares nails for better polish adhesion and a flawless finish. Avoid Cotton Fibers Cotton fibers can stick to nails and cause problems under gel polish. These tiny fibers create bumps and rough spots. Avoid cotton balls or pads when cleaning nails. Choose lint-free options to keep nails clean and smooth for gel polish application. Dehydrate Nails Dehydrating nails is a key step before applying gel polish. It removes moisture and oils that prevent proper adhesion. Nails free of moisture help gel polish last longer and resist chipping. This step ensures a smooth surface for the polish to stick to. Without dehydration, gel polish may lift or peel quickly. Apply Nail Dehydrator Use a nail dehydrator to dry the nail surface. Apply it … Read more

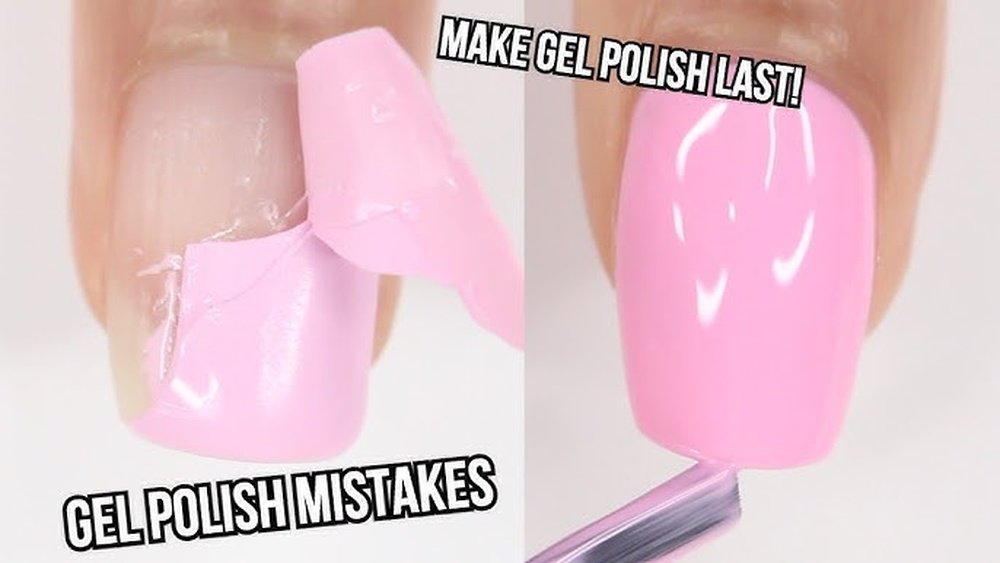
How to Make Gel Nails Last Longer: Expert Tips for Durable Shine

how to make gel nails last longer​

You’ve just got your gel nails done, and they look flawless. But how do you keep that fresh, glossy finish for weeks without worrying about chips or lifting? If you’re tired of seeing your beautiful gel manicure peel or fade too soon, you’re not alone. The good news is, with the right steps before, during, and after your gel nail appointment, you can make your gel nails last much longer. You’ll discover simple, practical tips that nail pros swear by—so you can enjoy strong, stunning nails that hold up through all your daily activities. Ready to make your gel nails last? Let’s dive in! Nail Preparation Proper nail preparation is the foundation for gel nails that stay flawless for weeks. Skipping or rushing through this step can lead to premature chipping and lifting. Taking a few extra minutes to prep your nails properly makes a big difference in how long your gel manicure lasts. Clean And Dehydrate Nails Start with clean nails free from oils, lotions, or sweat. Use a nail cleanser or rubbing alcohol to wipe each nail thoroughly. This removes natural oils that prevent gel polish from adhering properly. Next, apply a nail dehydrator. This product helps strip away any lingering moisture, creating a dry surface that gel can bond to. Without dehydration, your gel polish may peel off quickly even if applied perfectly. Buff Nail Surface Gently buffing your nail surface removes the shiny top layer. This creates tiny grooves that give the gel polish something to grip onto. Use a fine-grit buffer and work lightly—too much buffing can thin your nails and cause damage. Think of it as prepping a canvas before painting. Without this step, your gel polish can slide off easily, no matter how many coats you apply. A smooth, matte surface is what you want before moving to polish application. Remove Cuticle Residue Cuticle residue and dead skin act as barriers between your natural nail and gel polish. Use a cuticle pusher or orangewood stick to gently push back and remove any excess cuticle. Avoid cutting too aggressively to prevent irritation. Leaving cuticle residue behind can cause your gel to lift along the edges. Have you ever noticed your gel nails peeling near the cuticles? That’s often the culprit. Cleaning this area well helps your manicure stay intact longer. Credit: www.nailpolishdirect.co.uk Application Techniques Application techniques play a vital role in how long gel nails last. Proper steps during application help prevent lifting and chipping. Small details make a big difference. Follow these tips to improve your gel manicure’s durability. Apply Thin Coats Thin coats of gel polish cure better under UV or LED light. Thick layers may not dry properly. This causes bubbles, wrinkling, and peeling. Apply each layer evenly and sparingly. Let the light cure the polish fully before adding the next coat. Cap The Nail Edges Capping the edges seals the polish at the tip. Brush the base, color, and top coats over the free edge. This creates a barrier that stops water and dirt from getting underneath. Capping helps stop premature lifting and extends the life of your gel nails. Avoid Polishing Cuticles Keep polish away from cuticles and skin. Polishing cuticles leads to lifting and peeling. Leave a small gap between the polish and cuticle line. This allows the gel to bond directly to the nail plate. Clean edges create a neat, lasting finish. Proper Curing Proper curing is essential to make gel nails last longer. It ensures the polish hardens completely. This creates a strong, durable finish that resists chipping and lifting. Without proper curing, gel nails may peel or wear off quickly. Understanding the curing process helps you get the best results from your gel manicure. Use Quality Led/uv Lamp A good LED or UV lamp is key for proper curing. Cheap lamps may not cure polish evenly. This can cause sticky or soft spots on your nails. Choose a lamp that matches your gel polish brand. High-quality lamps cure polish faster and more thoroughly. This improves the nail’s strength and shine. Cure Each Layer Fully Curing each layer fully is important. Thin layers dry faster and cure better. Spend the full recommended time under the lamp for every coat. This includes base, color, and top coats. Skipping or shortening curing time weakens the gel’s hold. Fully cured layers last longer and resist damage. Avoid Thick Layers Apply thin layers of gel polish. Thick layers take longer to cure and may stay soft inside. Soft gel lifts or peels easily. Thin coats cure evenly and create a smooth finish. Apply multiple thin layers rather than one thick one. This helps gel nails stay intact for weeks. Aftercare Tips Proper aftercare keeps gel nails strong and shiny for weeks. Simple habits help avoid lifting and chipping. Follow these tips to protect your manicure daily. Apply Cuticle Oil Daily Cuticle oil nourishes skin around your nails. It stops dryness and peeling. Massage oil into cuticles each day. This keeps nails flexible and less likely to break. Healthy cuticles support long-lasting gel polish. Wear Gloves For Chores Household chores expose nails to water and chemicals. These weaken gel polish and cause lifting. Wear gloves when washing dishes or cleaning. Gloves act as a barrier to protect your nails. Use them every time you do wet tasks. Avoid Using Nails As Tools Using nails to open cans or scratch surfaces damages gel polish. This causes chips and cracks. Use proper tools instead of your nails. Treat your manicure gently to keep it intact. Your gel nails will stay perfect longer. Choosing The Right Products Choosing the right products is key to making gel nails last longer. The quality and compatibility of your gel nail products affect durability. Using mismatched or low-quality items can cause peeling and chipping. Invest in good base coats, gel polishes, and top coats designed to work together. This ensures a strong bond and smooth finish. Also, consider builder gels to add strength to your nails. Each … Read more

The 7 Best Metal Nail Files for Natural Nails in 2026 Reviewed

The 7 Best Metal Nail File for Natural Nails

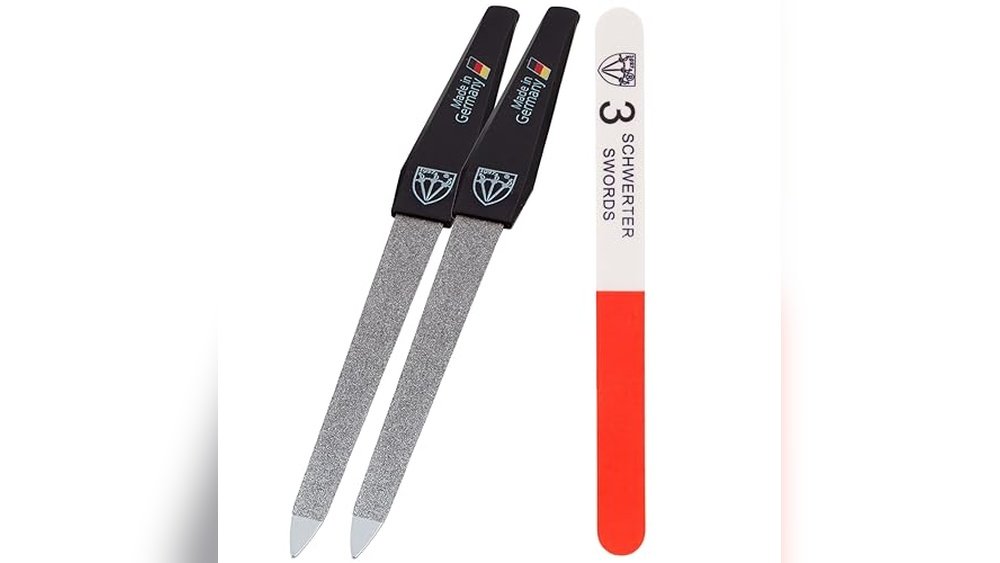
Keeping natural nails neat and smooth is a simple pleasure. Yet, finding the right metal nail file can be surprisingly tricky. Many people struggle because metal nail files vary in grit, size, and durability. Some are gentle but wear out quickly. Others last longer but feel too harsh on delicate nails. Choosing between portability, comfort, and effectiveness often feels like a balancing act. There’s no one-size-fits-all solution. Each option comes with trade-offs depending on your nail type and how you use it. This article will help clarify those choices. It aims to guide you through the main factors to consider so you can find a metal nail file that suits your natural nails and personal needs. What Matters When Choosing A Metal Nail File Focus on the file’s texture and durability first. A good file should shape your nails without causing damage. Consider the handle for grip and control, especially if you file on the go. Also, think about the file’s size and whether it fits your lifestyle, whether at home or traveling. The products ahead are grouped based on features like size, grit type, and included accessories. This way, you can match them to different preferences and situations. Keep in mind that what works well for one person might not be ideal for another. 3 Swords Germany Sapphire Metal Nail File Set Among The 7 Best Metal Nail File for Natural Nails, this set is ideal for those seeking durable, professional-grade nail care tools made for natural nails.   Check Latest Price This 3-piece set from 3 Swords Germany includes two sapphire-coated metal nail files and a 3-way nail buffer, designed to provide professional-quality care for natural nails. The durable sapphire grit ensures long-lasting abrasivity, helping to quickly repair and shape nails without causing damage. Using these files feels smooth and reliable, with fine and coarse sides for versatile shaping on the go. I found the stainless spring steel construction offers excellent durability, making it a dependable companion for both home and travel use. High-quality sapphire grit coating for long-lasting use Double-sided files with fine and coarse surfaces Includes a 3-way buffer for a polished finish Compact size ideal for travel and everyday use Choosing This Set If you want a professional-grade nail file set that combines durability with versatility, this 3-piece set is a smart choice. It’s especially suited for natural nails needing gentle yet effective shaping and repair. Those looking for a quick fix on broken nails will appreciate the fine craftsmanship and robust materials. However, if you prefer disposable or less sturdy files, this premium set might be more than necessary. It’s best for users who value quality and longevity over single-use convenience. Keep the files clean and store them in their case to maintain their abrasiveness and hygiene. This simple care routine will extend their lifespan and keep your nails looking their best. Overall, this set removes the uncertainty around nail maintenance by offering tools you can trust, making nail care straightforward and stress-free. Gigaground Stainless Steel Metal Nail Files Among The 7 Best Metal Nail File for Natural Nails, this set is ideal for anyone seeking durable and precise nail care tools.   Check Latest Price This is a set of six metal nail files crafted from high-quality stainless steel with durable sapphire dust coating, designed to last longer and provide precise filing for natural nails. The sharp pointed tip helps clean underneath nails, while the anti-slip handle offers easy control, making nail care more efficient and comfortable. Using these nail files feels reliable and smooth, thanks to the fine grit that shapes and smooths nails gently without damage. Whether at home, in a salon, or on the go, their handy 6-inch size and colorful options add convenience and style to your nail care routine. Durable sapphire dust coating for long-lasting use Anti-slip handle ensures comfortable and steady grip Double-sided fine grits suitable for natural, acrylic, and false nails Compact 6-inch size ideal for travel and storage Who Should Consider This Product This nail file set is perfect for anyone looking for reliable, long-lasting tools to maintain natural nails with precision and ease. If you prefer metal files over traditional emery boards and want a product that works well for multiple nail types, this set fits your needs. However, if you are looking for an electric or battery-operated file, or prefer softer materials, this may not be the best choice. The pointed tip requires careful handling to avoid injury. These files remove the confusion of choosing between flimsy or short-lived options, offering a robust solution that lasts. A practical tip: store them in the included compact kit to keep the files clean and ready to use. Rest assured, the quality stainless steel material means you won’t need frequent replacements. 3 Swords Germany Double Sided Sapphire Nail File Among The 7 Best Metal Nail File for Natural Nails, this file is ideal for anyone seeking a durable, travel-friendly tool for quick nail repairs.   Check Latest Price This metal nail file from 3 Swords Germany is a compact, double-sided sapphire-coated tool designed for both fine and coarse filing. It solves the common problem of broken or uneven natural nails on the go, offering a precise finish thanks to its durable stainless spring steel construction. The included hard case ensures safe and clean transport, making it perfect for travel or daily use. Using this nail file feels effortless and reliable, whether at home or out and about. The fine and coarse sides provide versatility, allowing quick fixes or gentle shaping with confidence. I appreciate how its sturdy design and portability save me time and avoid nail mishaps during busy days. Durable double-sided sapphire coating for fine and coarse filing Compact size (4.3 inches total length) with protective hard case Made from stainless spring steel for lasting performance Ideal for travel or quick nail repairs anywhere Who Should Choose This Nail File? This nail file is perfect for those who want a reliable, long-lasting tool to … Read more

The10 Best Accessories to Pair With Bodycon Dresses for Stunning Looks

Best Accessories to Pair With Bodycon Dresses​

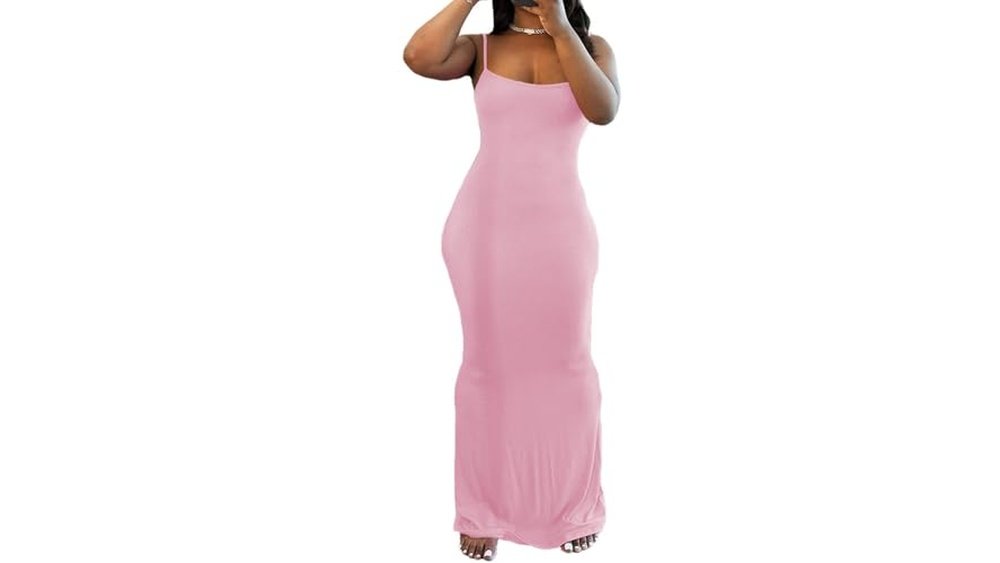
Have you ever struggled to find the perfect accessory that matches your bodycon dress? It can be frustrating when your outfit looks almost right but feels incomplete. You might spend extra time worrying about what shoes, jewelry, or bags to pair with your dress. This stress can take away from the confidence you want to feel when you step out. The right accessories can change everything. They help you shine and feel comfortable in any setting—whether it’s a party, work, or a casual day out. With the perfect pairing, your bodycon dress becomes a complete look that turns heads and boosts your mood. In this review, I’ll share some of the best accessories to pair with bodycon dresses. Keep reading to find easy, stylish options that will make dressing up a joy! Pinsv Women Summer Long Dress The PINSV Women Summer Long Dress Casual Slip Sexy Sleeveless Bodycon Maxi Dresses in Pink is ideal for women who want to combine comfort with style during the warmer months. Perfect for those seeking a versatile dress for casual outings, beach days, or summer parties, this dress caters to fashion-conscious individuals who appreciate a flattering, body-hugging fit without sacrificing ease of wear. Pros: Made by the reputable PINSV brand ensuring quality and durability. Lightweight and breathable fabric ideal for hot weather. Sleeveless design enhances comfort and freedom of movement. Bodycon fit accentuates natural curves for a sexy, confident look. Elegant maxi length suitable for various occasions, from casual to semi-formal. Attractive pink color adds a feminine and vibrant touch. Cons: Limited color options may restrict style variety. Bodycon style may not be comfortable for those preferring loose-fitting dresses. The PINSV Women Summer Long Dress features a sleek and flattering silhouette designed to enhance the wearer’s figure. Its casual slip style makes it easy to put on and take off, while the sleeveless cut ensures maximum comfort during hot days. The fabric choice allows for breathability, making it a practical option for summer while maintaining an elegant appearance. This dress is not only stylish but also highly versatile. Whether you’re heading to a beach outing or a casual evening event, the maxi length and bodycon design create a look that is both trendy and sophisticated. The pink color adds a fresh and youthful vibe, making it a standout piece in any wardrobe. Overall, the PINSV summer dress offers a perfect blend of comfort, style, and femininity for women looking to elevate their summer fashion. Women’s Bodycon Maxi Dress The Women’s Bodycon Maxi Dress Short Sleeve Round Neck Casual Long Dress Sexy Night Out Party Dresses-Black-M is ideal for women who want to combine elegance with comfort for various occasions. Perfect for those seeking a versatile dress that can transition effortlessly from a casual day out to a chic night event, this dress is designed for fashion-conscious individuals who appreciate a flattering fit and stylish look. Pros: Made by trusted brand HBQ ensuring quality and durability. Elegant black color that suits multiple occasions and complements various accessories. Comfortable short sleeve and round neck design ideal for warm weather and layering. Bodycon fit enhances natural curves providing a sexy and confident appearance. Lightweight fabric with manageable dimensions and weight for ease of wear and movement. Cons: Limited color option may not suit everyone’s preference. Size M might not fit all body types perfectly, requiring careful size selection. Not suitable for very formal or professional settings due to its casual and sexy style. This maxi dress features a sleek bodycon silhouette that hugs the body, highlighting feminine curves beautifully. The short sleeves combined with the round neck design offer a classic yet contemporary look that is both comfortable and stylish. Its black color adds a timeless elegance, making it easy to accessorize for day or evening events. The lightweight fabric ensures breathability, making it ideal for parties, night outs, or casual gatherings. Users will appreciate the versatility of this dress, as it can be paired with heels for a sexy night out or dressed down with flats for a casual daytime look. The brand HBQ guarantees a quality garment that maintains shape and color through multiple wears. Overall, this dress offers an excellent balance between style, comfort, and practicality for women looking to enhance their wardrobe with a chic and flattering piece. Qaffier Womens Summer Bodycon Mini Dress The Qaffier Womens Summer Bodycon Mini Dress in Dark Red is perfect for women seeking a stylish, comfortable, and versatile dress for casual outings, parties, or club events. Ideal for those who want to showcase a chic look with a flattering fit, this sleeveless ribbed knit tank dress is designed for individuals who appreciate both fashion and comfort during warm weather. Pros: Flattering bodycon fit that accentuates curves Breathable and stretchy ribbed knit fabric for all-day comfort Classic scoop neck design adds a feminine touch Suitable for various occasions like parties, clubs, and casual wear Attractive dark red color that stands out elegantly Cons: Limited color options available Might not provide enough coverage for cooler weather This Qaffier summer dress features a sleeveless design and a ribbed knit fabric that offers flexibility and breathability, making it ideal for hot summer days. The bodycon silhouette ensures a snug fit that enhances your natural shape, while the scoop neck adds an elegant neckline that complements various accessories. Its dark red hue lends a bold and confident vibe, perfect for evening events or casual gatherings. Additionally, the dress’s lightweight material and sleeveless cut provide excellent comfort and freedom of movement. Whether you’re heading to a club or enjoying a casual day out, this mini dress combines style with practicality. The Qaffier brand focuses on delivering fashionable yet affordable apparel, ensuring that you get a trendy piece without compromising on quality or comfort. Fishnet Lingerie Bodysuit For Women Ideal for women seeking a bold and alluring outfit, the Fishnet Lingerie Bodysuit for Women is perfect for those who want to express confidence and sensuality at sleepovers, club nights, rave parties, or glow … Read more

Color Psychology in Fashion: Style Secrets That Influence You

Color Psychology in Fashion:

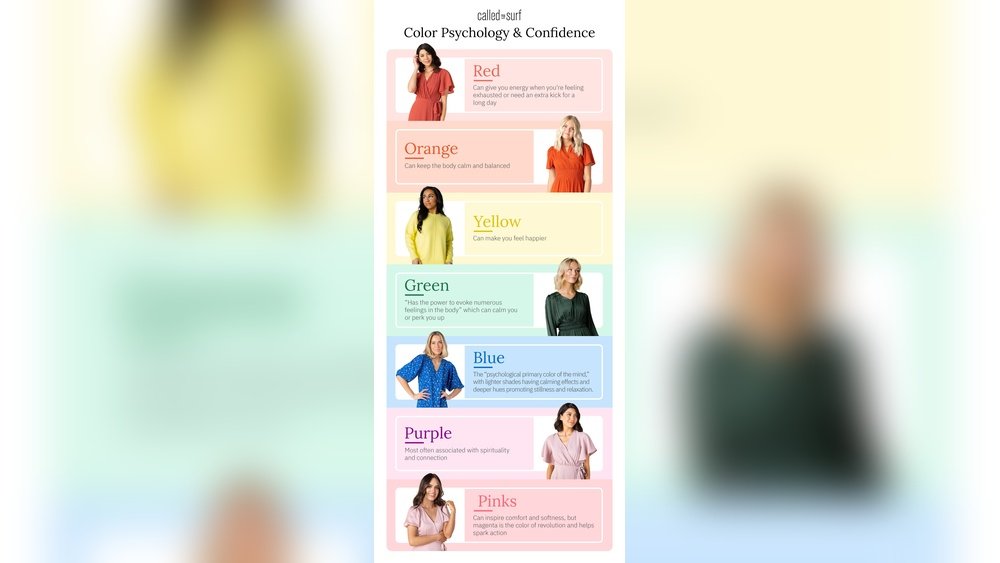
Have you ever wondered why you feel more confident in a red dress or calmer in a blue shirt? The secret lies in color psychology—a powerful tool that fashion uses to speak without words. The colors you choose to wear don’t just shape how others see you; they also influence your mood, energy, and even how you perform in daily situations. Whether you want to impress in an interview, express creativity, or simply boost your own spirits, understanding color psychology can transform your wardrobe into a personal power source. Ready to discover how the right hues can elevate your style and mindset? Keep reading to unlock the fascinating connection between color and fashion—and learn how to make every outfit work for you. Color Impact On Emotions Colors in fashion have a powerful effect on emotions. They can change how you feel and how others see you. Choosing the right color can improve your mood and confidence. Colors send silent messages without words. Understanding these messages helps you dress to express or influence emotions. How Colors Influence Mood Colors affect the brain and body. Warm colors like red and orange create energy and excitement. Cool colors like blue and green bring calm and peace. Bright colors lift spirits and increase happiness. Dark colors may feel serious or sad. The right color can set the tone for your day. Boosting Confidence With Color Wearing certain colors can make you feel stronger. Red is linked to passion and power. Black shows elegance and authority. These colors can help you feel more confident in meetings or events. They make a bold statement without saying a word. Dressing with confidence changes how you act and how others react. Colors That Calm And Relax Soft blues and greens help reduce stress. These colors remind us of nature and water. Light shades create a peaceful feeling. Wearing calming colors helps lower anxiety and improve focus. They are perfect for busy days or stressful situations. Calm colors make you feel grounded and balanced. Credit: dishafashioninstitute.com Meaning Behind Key Colors Colors in fashion speak louder than words. They influence how others see us and how we feel inside. Each color carries a special meaning. Choosing the right color can change your mood and boost your confidence. Understanding these meanings helps you pick clothes that express your true self. Here are key colors and what they represent in fashion. Red For Passion And Power Red grabs attention. It shows passion, strength, and boldness. People see red as a confident, energetic color. Wearing red can make you feel more powerful and excited. It works well for important events or moments when you want to stand out. Blue’s Calm And Trust Blue creates a calm feeling. It is linked to trust and reliability. Dark blue looks professional and serious. Light blue feels friendly and relaxed. Blue is a great choice for work or interviews. It helps you seem honest and peaceful. Green’s Harmony And Growth Green symbolizes nature and balance. It shows harmony, growth, and health. People find green soothing and fresh. Wearing green suggests you are calm and steady. It is perfect for casual days or times you want to feel grounded. Yellow’s Energy And Creativity Yellow shines with energy and joy. It sparks creativity and optimism. Yellow draws the eye and lifts the mood. It suits playful, fun occasions. Wearing yellow can make you feel happier and more open to new ideas. Black’s Elegance And Authority Black stands for elegance and power. It feels formal and strong. Black clothes show authority and style. People often wear black to look professional and serious. It suits almost any occasion, from business to evening events. White’s Purity And Simplicity White means purity and simplicity. It gives a clean, fresh look. White can feel modern and minimalist. Wearing white shows you like neatness and order. It works well in warm weather or for a soft, calm style. Purple’s Luxury And Imagination Purple links to luxury and creativity. It feels rich and unique. Purple colors suggest imagination and individuality. People use purple to stand out with elegance. Wearing purple can boost feelings of confidence and mystery. Color Choices For Different Settings Choosing the right colors for different settings affects how others see you and how you feel. Colors send silent messages about your mood, confidence, and personality. Matching colors to occasions helps make strong impressions and supports your goals. Below are key tips for selecting colors in various environments. Dressing For Interviews And Business Dark blue and gray show professionalism and trust. These colors make you appear calm and reliable. Black signals power but can feel too strong if overused. White adds a clean, neat touch to your outfit. Avoid overly bright colors that distract or seem unprofessional. Simple, solid colors work best for interviews and formal meetings. Colors For Creative Roles Creative jobs allow more freedom with colors. Purple suggests imagination and originality. Green feels fresh and balanced, good for open-minded roles. Yellow stands out and shows energy and optimism. Combining these colors reflects a unique, friendly personality. Choose shades that feel natural but express creativity clearly. Socializing With Vibrant Hues Bright reds and yellows attract attention and invite conversation. These colors create a lively, positive vibe. Wearing vibrant hues helps you stand out in social settings. They make you seem approachable and fun. Balance bright colors with neutral tones to avoid overwhelming your look. Managing Mood Through Clothing Colors can lift or calm your mood throughout the day. Blue tones reduce stress and promote focus. Warm colors like red and orange boost energy and confidence. Soft pastels ease anxiety and bring comfort. Pick your outfit’s colors based on how you want to feel or act. Use clothing to support your emotional well-being easily. Credit: www.printful.com Cultural And Personal Color Context Colors in fashion carry meaning beyond style. They reflect culture and personal taste. Understanding this helps you choose outfits that express who you are. Color meanings change with background and experience. This … Read more

How to Dress Confidently Without Following Trends: Timeless Style

How to Dress Confidently Without Following Trends

You don’t need to chase every trend to look and feel amazing. Imagine opening your closet and knowing exactly what to wear—pieces that fit you perfectly and make you stand out for all the right reasons. Dressing confidently isn’t about following the crowd; it’s about owning your unique style and expressing who you are. You’ll discover simple ways to build a wardrobe that boosts your confidence without the stress of trends. Ready to unlock your personal style and turn heads wherever you go? Keep reading to find out how. Credit: www.jovani.com Build A Signature Wardrobe Building a signature wardrobe helps create confidence without chasing trends. It focuses on timeless style and personal comfort. This approach makes dressing easier and more enjoyable every day. A well-curated wardrobe reflects your personality and fits your lifestyle perfectly. Choose Classic Pieces Select clothing that never goes out of style. Think simple cuts and clean lines. A tailored blazer, a white button-down shirt, or well-fitted jeans work well. These pieces mix and match easily. They form the base of your signature look. Avoid flashy details that fade quickly from fashion. Prioritize Quality Over Quantity Invest in fewer but better items. Quality fabrics last longer and feel nicer. Look for natural materials like cotton, wool, or linen. Check stitching and buttons for durability. High-quality clothes keep their shape and color after washing. This saves money and reduces waste over time. Stick To Neutral Colors Neutral tones create a versatile wardrobe. Colors like black, white, navy, beige, and gray blend well together. They make outfit planning simple and quick. Neutral colors suit any occasion and season. Add small pops of color with accessories if desired. This keeps your style fresh without overwhelming your look. Focus On Fit And Comfort Dressing confidently starts with focusing on fit and comfort. Clothes that fit well and feel good help you look and feel your best. Comfort lets you move freely without distraction. Fit shapes your silhouette and highlights your best features. Prioritize these elements over fast-changing trends for timeless style. Know Your Body Shape Identify your body shape to find flattering clothes. Different styles suit different figures. Choose cuts that enhance your natural shape. Avoid clothes that add bulk or hide your form. Understanding your body helps you buy pieces that fit well and boost confidence. Tailor Clothes When Needed Off-the-rack clothes rarely fit perfectly. Visit a tailor to adjust hems, sleeves, and waistlines. Small changes can transform how clothes fit and look. Tailoring ensures your outfit feels custom-made. Well-fitted clothes improve posture and comfort instantly. Select Comfortable Fabrics Pick fabrics that feel soft and breathable on your skin. Natural fibers like cotton, linen, and wool offer comfort and durability. Avoid stiff or itchy materials that restrict movement. Comfortable fabrics keep you relaxed and confident all day. Quality fabric also lasts longer, saving money over time. Express Your Personality Dressing confidently means showing who you really are through your clothes. It is not about copying what everyone else wears. Your style should tell a story about your personality. Clothes become a way to express your mood, values, and creativity. When you dress to show your true self, you feel stronger and more comfortable. This confidence shines through in your actions. It draws people to you naturally. The key is to find pieces that reflect your unique character and make you happy. Incorporate Meaningful Accessories Accessories add a personal touch to any outfit. Choose items that have special meaning or tell a story. A necklace passed down in your family or a bracelet from a trip can make your look unique. These small details show your background and interests. Pick accessories that match your daily life and personality. They can be subtle or bold but must feel right to you. Wearing meaningful pieces helps you stand out without following trends. Use Color To Reflect Mood Colors speak louder than words in fashion. They express how you feel without saying a thing. Select colors that match your mood or the message you want to send. Bright colors show energy and joy. Dark shades can feel serious or calm. Do not worry about what is popular. Wear colors that make you smile or feel strong. When your clothes reflect your inner self, your confidence grows. Color becomes a simple, powerful way to express personality. Mix And Match Thoughtfully Mixing different clothes lets you create a style that belongs only to you. Combine items you love from various places and times. Pair a vintage shirt with modern pants or a casual top with elegant shoes. This shows creativity and a personal story. Think about how pieces work together in color, shape, and comfort. The right mix makes your outfit feel natural and true to you. It also keeps your wardrobe fresh without chasing trends. Thoughtful mixing means dressing with heart. Credit: footwearmagazine.com Create A Versatile Closet Creating a versatile closet helps you dress with confidence every day. A well-planned wardrobe saves time and reduces stress. It lets you mix and match pieces easily. This way, you look stylish without chasing trends. Focus on clothes that fit well and suit your style. Choose items that work for many occasions. Keep your closet simple but flexible. Quality over quantity is key. Apply The Five Outfit Rule The five outfit rule guides smart buying choices. Before buying, check if the item matches five things you own. If not, skip it. This rule stops clutter and boosts outfit options. It helps build a cohesive wardrobe. Each piece should fit your style and mix well. Following this rule creates a closet full of useful clothes. Invest In Multi-use Items Multi-use items are wardrobe heroes. Pick clothes that work for work and weekends. Examples include a classic blazer, dark jeans, or a simple dress. These pieces save money and space. They let you create many outfits with fewer clothes. Choose neutral colors and timeless cuts. Multi-use items keep your style fresh without extra effort. Rotate Seasonal Staples Rotate your … Read more

How to Dress for Your Body Shape

How to Dress for Your Body Shape

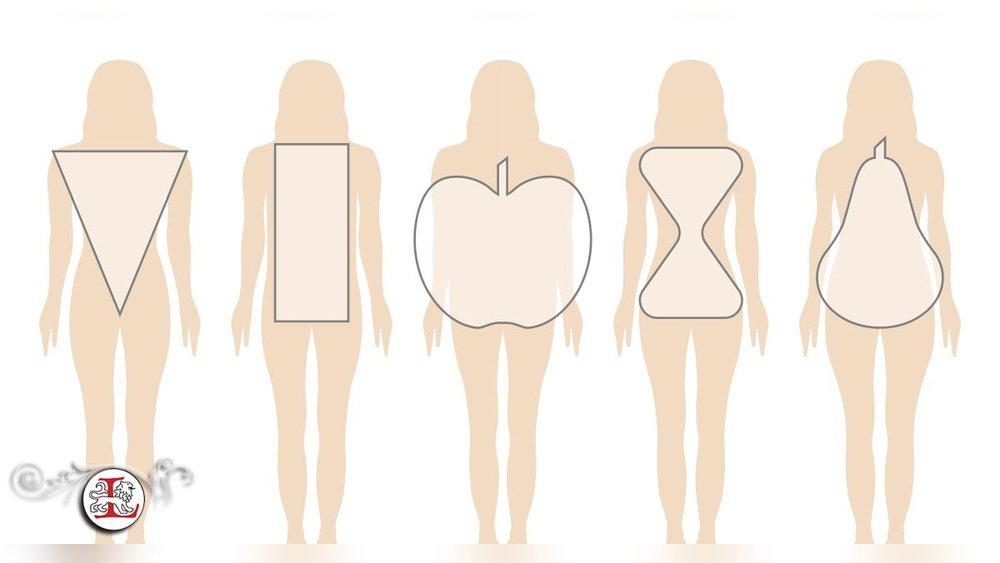
Are you ready to unlock the secret to looking and feeling your best every time you get dressed? Understanding how to dress for your body shape isn’t about following every fashion trend—it’s about highlighting your unique features and creating a balanced, flattering silhouette that boosts your confidence. Whether you have an hourglass figure, pear shape, or something else, the right clothes can make all the difference. Keep reading, and you’ll discover simple, practical tips tailored just for your body type that will transform your wardrobe and your self-image. Don’t settle for clothes that don’t celebrate you—let’s find the styles that truly work for your shape! Credit: zapaka.com Identify Your Body Shape Knowing your body shape helps you choose clothes that fit and flatter you. Clothes that match your shape highlight your best features. It makes shopping easier and boosts your confidence. Start by understanding the five main body shapes. Each shape has unique traits and styling tips. Inverted Triangle This shape has broad shoulders and a wider bust than hips. The upper body looks stronger than the lower half. Choose clothes that soften your shoulders. V-neck tops and darker colors on top work well. Add volume to your hips with A-line skirts or wide-leg pants. Pear Shape Hips are wider than the shoulders and bust in this shape. The lower body is the focus. Balance your look by adding volume to the upper body. Wear detailed tops, bright colors, or statement necklaces. Keep bottoms simple with dark jeans or A-line skirts. Hourglass Figure Shoulders and hips are about the same width. The waist is clearly defined. This shape suits clothes that highlight the waist. Wrap dresses, belts, and fitted tops work best. High-waisted pants or skirts also emphasize your curves. Rectangle Shape Shoulders, waist, and hips are similar in width. This shape has a straight silhouette. Create curves with belted dresses and peplum tops. Ruffles and tailored blazers add shape. Choose styles that add definition to your waist. Apple Shape Weight gathers around the midsection in this shape. The waist is less defined. Use clothes that elongate your torso. V-necks and scoop necks create a balanced look. Empire waist tops and flowy fabrics help avoid clinginess. Credit: www.corporatefashionista.com Dress For Hourglass Shape The hourglass body shape features balanced shoulders and hips with a clearly defined waist. Dressing for this shape means emphasizing natural curves and showcasing the waistline. Clothes that fit well help highlight the body’s natural proportions and create a polished look. Choosing the right styles enhances the hourglass figure’s best features. Focus on pieces that define the waist and fit snugly without being too tight. These tips make dressing simple and stylish. Highlight The Waist The waist is the hourglass shape’s strongest feature. Use belts or wrap dresses to draw attention to this area. Clothing with waist cinching or tailored cuts also works well. Avoid loose or boxy tops that hide the waist. Fitted Tops And Dresses Choose tops and dresses that follow the body’s natural curves. Fitted styles flatter the bust and waist without adding bulk. Stretchy fabrics help maintain comfort and shape. Avoid shapeless or oversized garments that hide your silhouette. High-waisted Bottoms High-waisted skirts and pants emphasize the narrow waist and elongate the legs. These styles balance the hips and create a smooth line. Pair with tucked-in or fitted tops to keep the waist visible. Avoid low-rise bottoms that can shorten the torso. Style Tips For Pear Shape The pear body shape features hips wider than shoulders and bust. Dressing well means balancing your proportions. Focus on enhancing your upper body to create harmony. Use simple, clean styles for your lower body. Accessories help draw attention upward and complete your look. Add Volume To Upper Body Choose tops with ruffles, puff sleeves, or shoulder pads. Light colors and patterns add visual interest. Boat necks and off-shoulder styles highlight your shoulders. Layer with structured jackets or blazers to build shape. These details create the illusion of broader shoulders. Balance With Simple Bottoms Wear dark, solid-colored pants or skirts to slim hips. Avoid heavy fabrics or busy prints on the lower half. A-line skirts and straight-leg pants work well. Keep bottoms fitted but not tight for comfort and style. This keeps the focus on your upper body. Use Statement Accessories Necklaces, scarves, and earrings attract attention upward. Choose bold, colorful pieces to brighten your face area. Wide-brim hats or headbands add volume above the shoulders. These accessories balance your silhouette nicely. They complete your outfit with style and flair. Credit: www.stitchfix.com Flatter Apple Shape The apple body shape carries weight around the midsection. Many with this shape have slim legs and arms. Dressing well can highlight your best features. Clothes that create a balanced look work best for apple shapes. Focus on elongating the torso to add height and slimness. Elongate The Torso Wear clothes that create a longer line for your torso. Vertical stripes and long cardigans help stretch your look. High-waisted pants or skirts lift the waist visually. Avoid bulky tops that add volume around the stomach. Fit and flare dresses highlight your legs and slim your middle. Choose Flowy Fabrics Pick fabrics that drape softly over the body. Flowy materials hide the midsection without clinging. Avoid stiff or heavy fabrics that add bulk. Lightweight chiffon, soft cotton, or jersey work well. Clothes that move with your body feel comfortable and look flattering. Opt For V-necklines V-neck tops create a longer, leaner neck line. They draw attention upward to your face and collarbone. Avoid high necklines that cut off the neck visually. Wrap tops and dresses also flatter this shape. These necklines balance your proportions and add style. Enhance Rectangle Shape The rectangle body shape has shoulders, waist, and hips of similar width. This shape often looks straight without many curves. Enhancing this shape means creating the illusion of curves and defining the waist. Simple styling tricks can add more shape and interest to your look. Create Curves With Belts Belts help define the … Read more

How to Build a Personal Style Mood Board: Inspire You

How to Build a Personal Style Mood Board

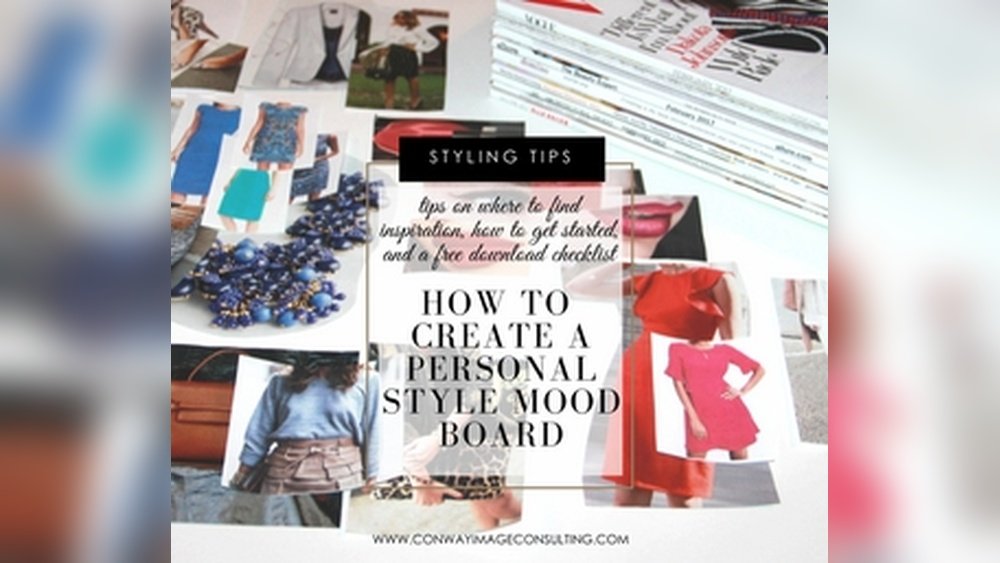
Do you ever feel stuck when trying to define your personal style? A personal style mood board might be the key to unlocking your fashion creativity. It’s a simple, fun way to gather your favorite looks, colors, and textures all in one place. By building your own mood board, you can see exactly what inspires you and make better choices for your wardrobe. Ready to discover how to create a mood board that truly reflects who you are? Keep reading, and you’ll learn the easy steps to build one that brings your style vision to life. Gather Inspiration Gathering inspiration is the first step to building your personal style mood board. It helps you see what attracts you and what fits your personality. Collecting various elements creates a clear picture of your style preferences. This step lets you explore and choose freely without pressure. Find Images And Textures Start by searching for images that speak to you. These can be photos of clothes, accessories, or even nature. Textures like fabrics or patterns add depth and interest. Use magazines, websites, or your own photos to gather these visuals. Choose images that feel right and show your style mood. Collect Color Swatches Colors set the mood of your style board. Pick swatches of colors that you love or want to try. These could be bright, soft, neutral, or bold shades. Use paint chips, fabric samples, or digital color tools. Group colors that look good together to create harmony in your board. Save Style Quotes And Words Words and quotes can express your style feelings. Find short phrases or words that inspire you or describe your style. These might be about confidence, comfort, or creativity. Add them to your mood board to give it personality. They help you stay focused on the style you want. Choose Your Tools Choosing the right tools shapes how you build your personal style mood board. The tools you pick affect your creativity and ease of use. Some prefer digital platforms, while others enjoy hands-on DIY boards. You can also combine both methods for a richer experience. Select tools that fit your comfort and style vision. Digital Platforms To Use Digital platforms offer easy ways to collect and organize images. Sites like Pinterest let you save photos from across the web. Canva provides templates for mood boards and simple editing tools. Milanote helps you arrange images, colors, and notes on one screen. These platforms let you update your mood board anytime, anywhere. Diy Physical Boards Physical boards bring a tactile feel to your mood board. Use corkboards, poster boards, or foam boards as your base. Cut out images from magazines or print your favorites. Add fabric swatches, color chips, and handwritten notes. This method makes your style vision tangible and can inspire new ideas. Mixing Digital And Physical Combining digital and physical tools gives you the best of both worlds. Start by collecting ideas digitally for easy browsing. Print your top picks to arrange on a physical board. Use your phone or tablet to add new finds on the go. This mix helps keep your style fresh and flexible. Define Your Style Theme Defining your style theme is the first step in building a personal style mood board. It helps you focus on a clear vision. This stage guides every choice you make. Your theme reflects your personality and lifestyle. It makes your mood board unique and authentic. Choosing a style theme creates harmony in your selections. It ensures all elements work well together. This foundation makes it easier to design your wardrobe or space. Start by thinking about what feels right to you. Let your style theme tell your story. Pick A Mood Or Vibe Choose a mood that fits your personality. It can be calm, edgy, playful, or elegant. The mood sets the tone for your entire style. Look for images that capture this feeling. Think about how you want to feel in your clothes or space. This vibe will guide your style choices clearly. Select A Color Palette Colors create emotion and style identity. Pick a palette with three to five main colors. Use shades that complement each other well. Your colors should match the mood you chose earlier. Include neutral tones to balance bold colors. This palette helps you stay consistent and focused. Add Patterns And Textures Patterns and textures add depth and interest to your style. Choose ones that match your color palette and mood. Think about stripes, florals, or geometric designs. Add textures like denim, silk, or leather. These details make your style mood board rich and tactile. Credit: themomedit.com Arrange Your Board Arranging your personal style mood board helps bring your vision to life. This step turns scattered ideas into a clear, inspiring layout. A well-arranged board guides your style choices and keeps your look focused. Follow simple tips to organize images, colors, and fonts effectively. Organize Images And Colors Group similar images to create visual harmony. Place photos with matching colors close together. Use color swatches to highlight your favorite palettes. Keep your board neat by avoiding clutter. This makes it easier to see your style theme clearly. Balance Visual Elements Mix large and small images for a dynamic look. Spread out bold colors to avoid overpowering one area. Leave some empty space to give your eyes a break. Balance keeps your board pleasant and easy to understand. It helps show your style in a natural way. Use Typography And Fonts Choose fonts that match your style mood. Use one or two font styles to keep it simple. Place words or quotes where they add meaning. Make sure text is easy to read. Typography adds personality and completes your mood board’s look. Refine And Edit Refining and editing your personal style mood board is a crucial step. It shapes your ideas into a clear, focused vision. This process helps you remove distractions and highlight your true style. Take your time to review each element carefully. Focus on what truly … Read more